Win10 + GTX 1050 Ti + CUDA 10.2 + cuDNN 8.6
A personal Windows laptop or desktop with an NVIDIA GPU can be used as a small deep-learning training machine. GPU training is usually dozens of times faster than CPU-only training. This page shows how to configure a GPU and build a deep-learning environment on a Windows PC.
Common GPU setup links. NVIDIA websites may be unstable from mainland China;
switching .com to .cn is often more reliable.
- CUDA and driver compatibility: https://docs.nvidia.com/cuda/cuda-toolkit-release-notes/index.html
- Driver download: https://www.nvidia.cn/geforce/drivers/
- CUDA download archive: https://developer.nvidia.cn/cuda-toolkit-archive
- CUDA 10.2 documentation: https://docs.nvidia.com/cuda/archive/10.2/
- cuDNN download: https://developer.nvidia.cn/zh-cn/cudnn
- cuDNN documentation: https://docs.nvidia.com/cuda/archive/10.2/
Deep-learning framework links:
- Official PyTorch page: https://pytorch.org/get-started/previous-versions/
- Historical PyTorch versions: https://pytorch.org/get-started/previous-versions/
1. Check GPU Status
1.1 Method 1: Device Manager
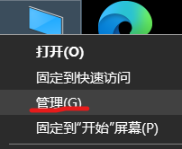
Right-click This PC on the desktop and choose Manage.
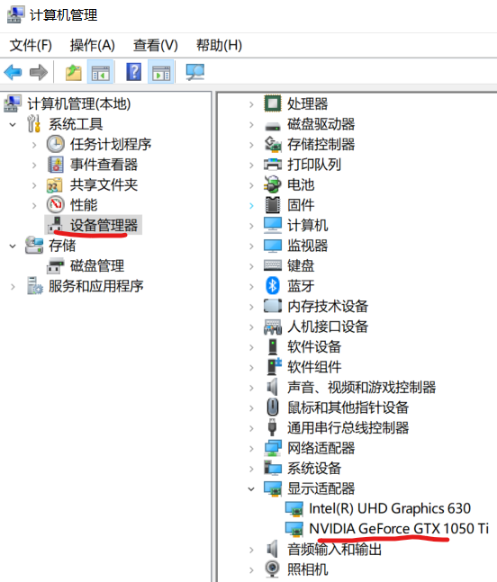
This machine has both an integrated GPU and a discrete GTX 1050 Ti GPU. In initial tests, the integrated GPU may help keep the display usable while the discrete GPU is used for training.
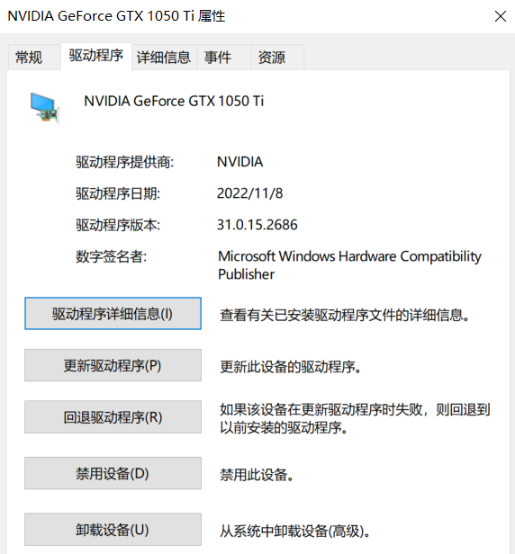
Right-click NVIDIA GeForce GTX 1050 Ti, choose Properties, and check the driver information.
*** Notes:
- The driver cannot usually be updated to the latest version from this screen. Download the latest driver from NVIDIA and install it manually.
- Even if the latest driver is installed, the version shown here may not match the installer version. It may refer to a different driver component.
1.2 Method 2: NVIDIA Control Panel
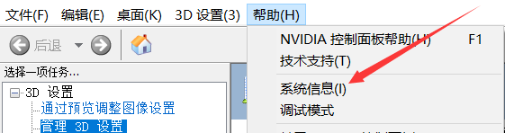
Right-click the desktop and open NVIDIA Control Panel.
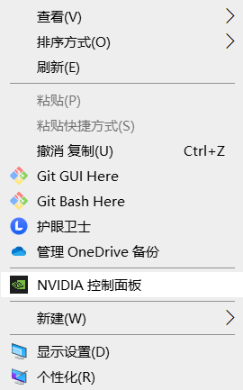
In NVIDIA Control Panel, choose Help -> System Information from the top menu.
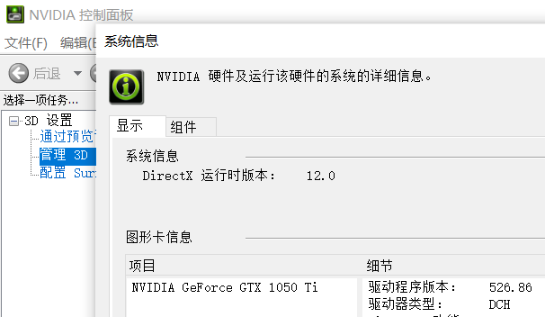
NVIDIA driver version information:
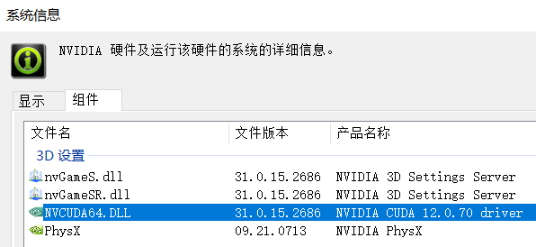
In the settings list, the NVCUDA64.DLL entry shows the CUDA version supported
by the current hardware and driver. On this machine it shows CUDA 11.1.
2. Update the GPU Driver
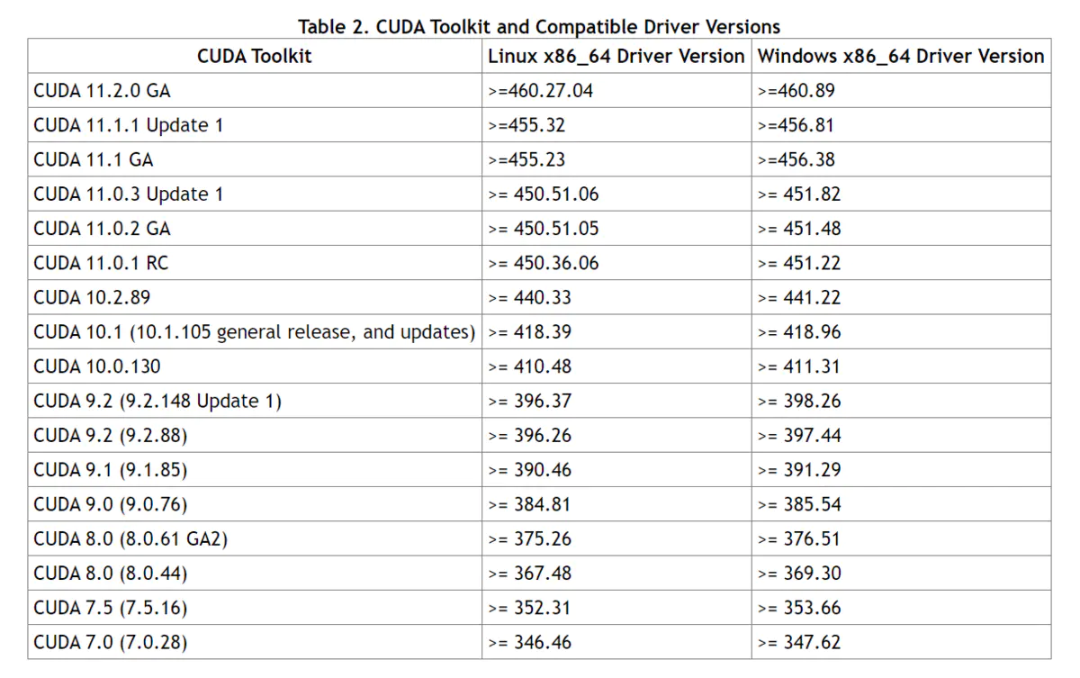
2.1 Driver and CUDA Compatibility
CUDA and NVIDIA driver versions have compatibility requirements. See: https://docs.nvidia.com/cuda/cuda-toolkit-release-notes/index.html
2.2 Method 1: Download from NVIDIA
Open the NVIDIA driver download page, https://www.nvidia.cn/geforce/drivers/, and search for the driver manually.
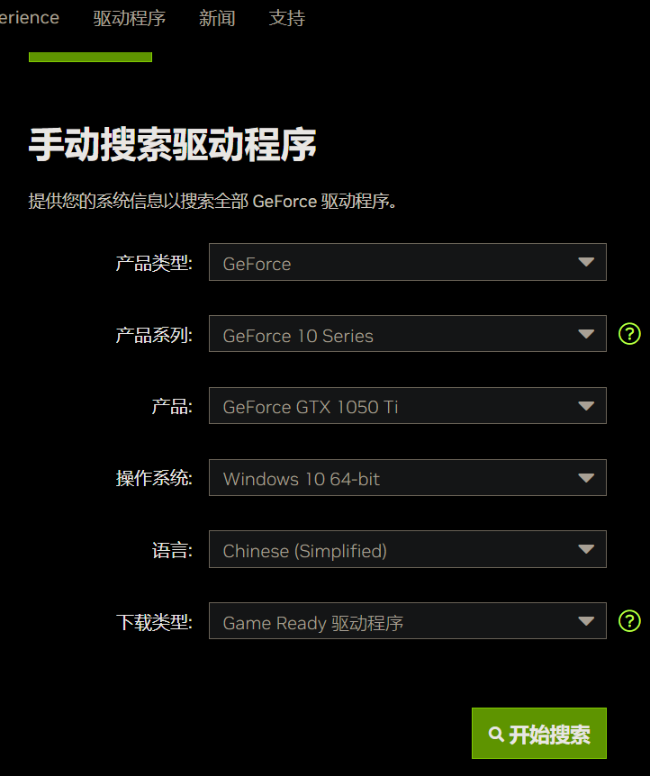
Download the latest driver, open the installer, and follow the installation wizard.

2.3 Method 2: Upgrade from Local NVIDIA Software
If an NVIDIA driver was installed before, Windows may already have GeForce Experience. You can use it to upgrade the driver online.
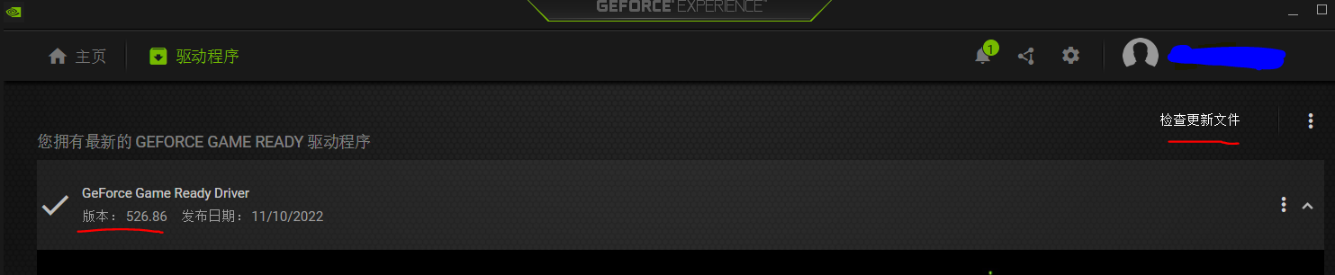
3. Install CUDA
3.1 Installation
- CUDA download archive: https://developer.nvidia.cn/cuda-toolkit-archive
- CUDA 10.2 documentation: https://docs.nvidia.com/cuda/archive/10.2/
Select the CUDA version you need. This example uses CUDA 10.2. Choose the
matching system configuration and installer type. The recommended installer is
exe [local], which downloads an offline package and avoids network failures
during installation.
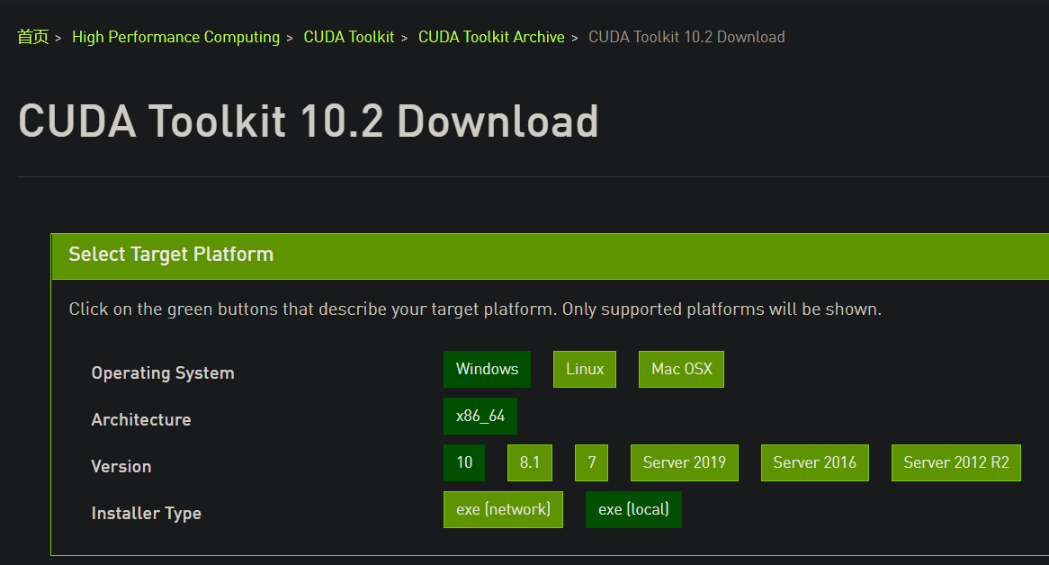
CUDA 10.2 includes one main installer and two patch packages. Download all of them.
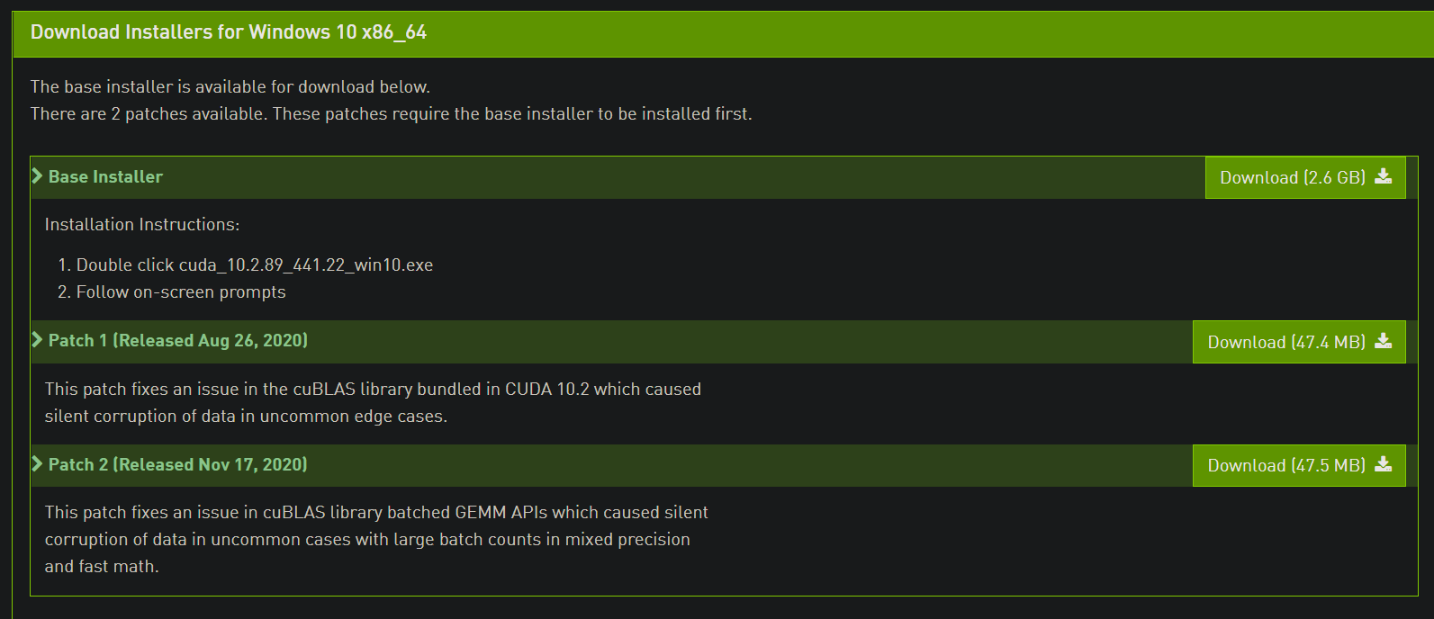
After downloading the .exe file, double-click it. The installer first asks for
a temporary extraction directory.
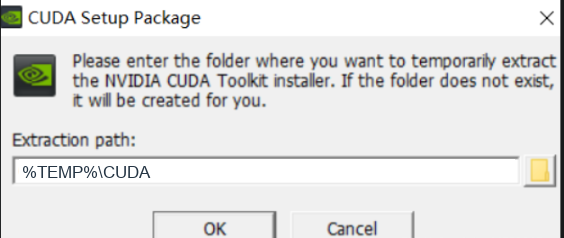
You can change the extraction path. Click OK, wait for the system check and license screen, then choose Custom installation. Uncheck Visual Studio components if they are not needed, because they can make installation fail.
Continue to the installation directory step, choose the target location if needed, and wait for installation to finish.
3.2 Verify the Installation
3.2.1 Check CUDA
Open the Windows Start menu, type cmd, open Command Prompt, and run:

If CUDA version information is printed, CUDA was installed successfully.
3.2.2 Check GPU Status
Open Command Prompt and run:
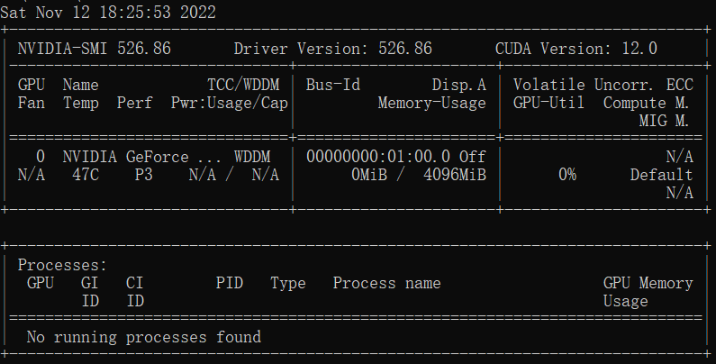
The output shows the driver version and the maximum CUDA version supported by the driver. This version may be higher than the CUDA Toolkit version you installed; it usually means the driver supports that CUDA version.
3.3 Configure Environment Variables
Desktop -> right-click This PC -> Properties -> search for Environment Variables -> choose Edit the system environment variables.
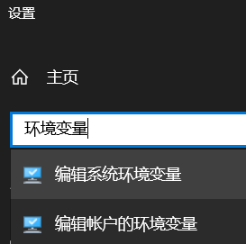
Click Environment Variables.
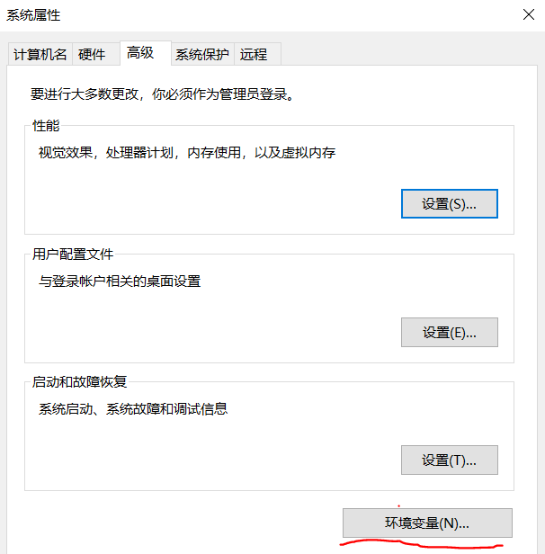
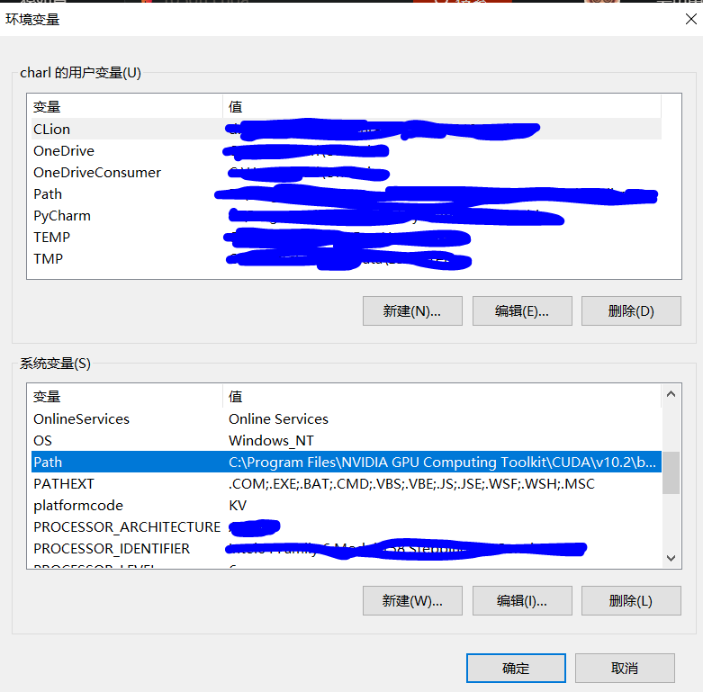
Select Path and click Edit.
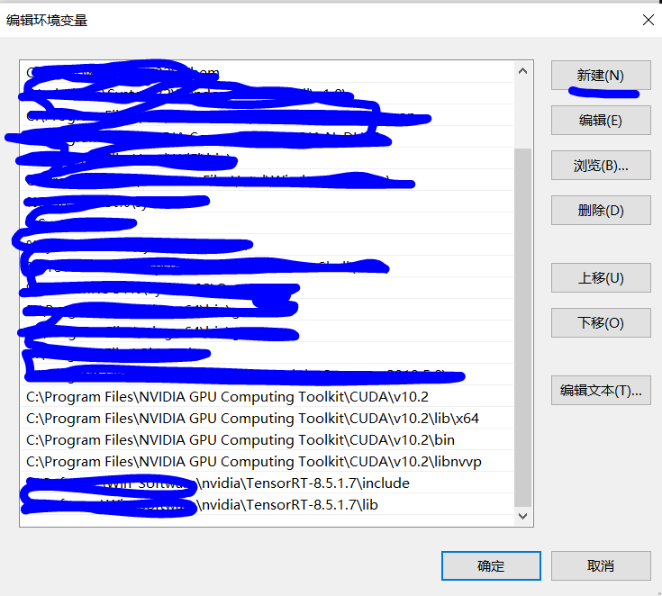
Add the following entries:
C:\Program Files\NVIDIA GPU Computing Toolkit\CUDA\v10.2
C:\Program Files\NVIDIA GPU Computing Toolkit\CUDA\v10.2\lib\x64
C:\Program Files\NVIDIA GPU Computing Toolkit\CUDA\v10.2\bin
C:\Program Files\NVIDIA GPU Computing Toolkit\CUDA\v10.2\libnvvp
4. Install cuDNN
You need an NVIDIA account to download cuDNN. Make sure the cuDNN version matches your CUDA version.
- cuDNN download: https://developer.nvidia.cn/zh-cn/cudnn
- cuDNN documentation: https://docs.nvidia.com/cuda/archive/10.2/
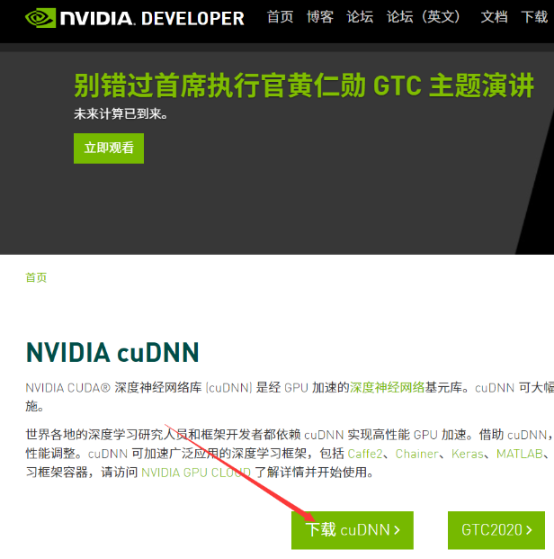
Register or log in as guided by the website. After registration, click the cuDNN download entry and choose the matching cuDNN package.
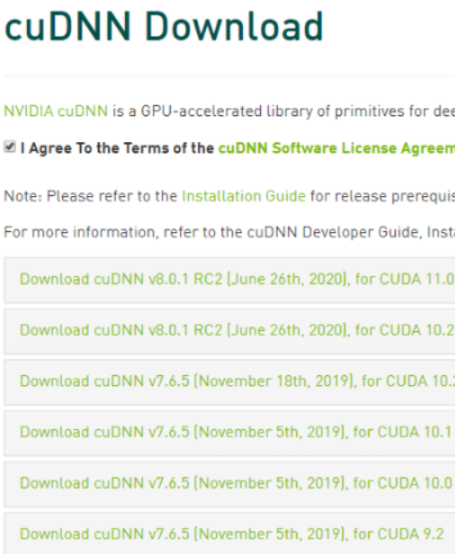
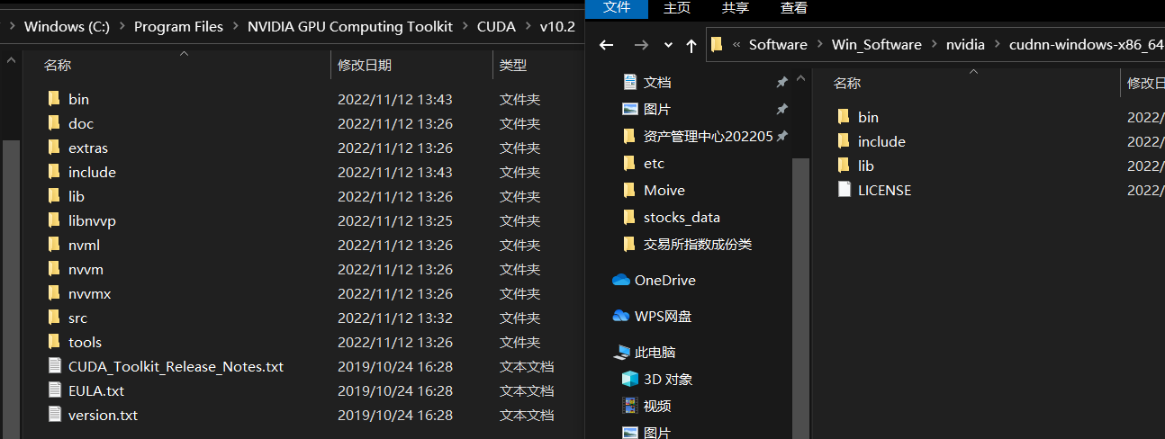
Extract the downloaded cuDNN archive. Copy the files inside each extracted folder into the folder with the same name under the CUDA installation directory. Do not replace the whole folders; copy the contents into the matching folders.
5. Install the GPU Version of PyTorch
5.1 Installation Steps
- Official page: https://pytorch.org/get-started/previous-versions/
- Historical versions: https://pytorch.org/get-started/previous-versions/
Select your environment on the website to get the installation command.
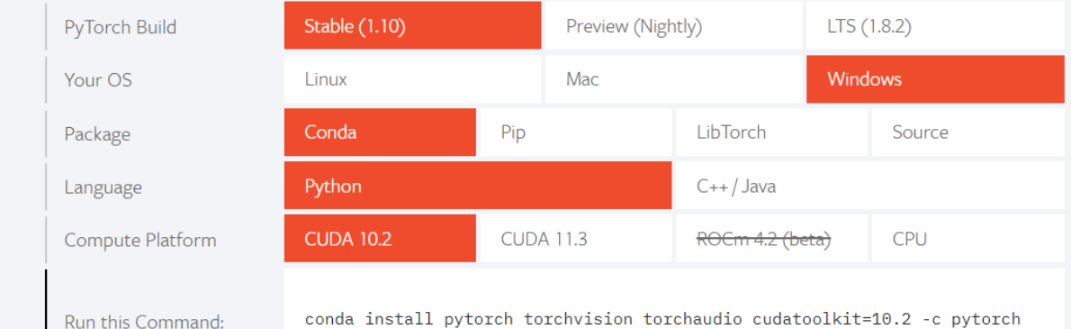
Open Command Prompt and run the command for the GPU or CPU version. The first command below installs the CUDA 10.2 GPU build; the second command is kept as a CPU-only option.
# CUDA 10.2
conda install pytorch==1.10.0 torchvision==0.11.0 torchaudio==0.10.0 cudatoolkit=10.2 -c pytorch

# CPU Only
conda install pytorch==1.10.0 torchvision==0.11.0 torchaudio==0.10.0 cpuonly -c pytorch
If Conda installation fails because of network issues, download the offline wheel from https://download.pytorch.org/whl/torch_stable.html.

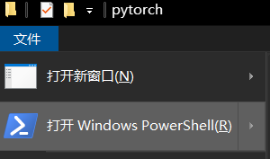
After downloading, open the download folder and choose Open Windows PowerShell from the menu.
Run:
5.2 Verify PyTorch
Open Command Prompt, start Python, and run:

If CUDA is available, the installation is successful.
References
- https://blog.csdn.net/weixin_44739865/article/details/121460260